Scrappy Linen shift dress

Here’s a look at my new favorite scrappy dress! Mostly linen with some cotton in the lace. I like to use a crazy patch-as-you-go method. I gather a pile of scraps or fabrics together and then start sewing pieces together to create a fabric. For a visually pleasing and flattering look I like to add one long skinny piece off center. I even added some machine embroidery to “pretty” it up, but you could just use fancy machine stitching like I did with my denim dress in the last post.
I wore it last week and it was a rather hot day, but this light colored linen was cool and comfortable. I was so happy to find uses for these left over scraps and was even happier to put these together for such a fun look. Go digging in your pile of leftover scraps and see what treasures lie there!
Linen Ruffle Skirt
I have to re-post this skirt blog post. Apparently, it gets “pinned” quite a bit and think that’s so cool! I made this about 5 years ago and not only do I still have this skirt, but it still fits woo hoo!! I must have spotted the original shirt too terribly so that’s gone along with the jacket that I think I might have given to my Mom? Hummm
![IMG_6542[1]](https://thethriftyneedle.files.wordpress.com/2012/03/img_65421.jpg?w=620)
Today I wear this skirt with one of my t-shirt re-makes that I teach in my classes.
![IMG_6541[1]](https://thethriftyneedle.files.wordpress.com/2012/03/img_65411-e1528638889948.jpg?w=620)
Or another look is to wear my linen re-make skirt with a shirt I made over from a linen skirt that I purchased from Salvation army…
![IMG_6544[1]](https://thethriftyneedle.files.wordpress.com/2012/03/img_654411.jpg?w=620)
Below is the original post with tutorial, enjoy and I hope it inspires you to go digging in your old linens and remake something fun!
This is my Favorite Skirt…. It’s a black, short lightweight skirt with ruffles. I wear it with tights and black boots . I just feel good in it!
Since I fixed up my jacket I was thinking about what to wear with it?? and I knew I wanted to copy that skirt!
So I dragged out an old stained linen table cloth and some other random linens to match. I wanted a vintage-y feel so Linen seemed best. My orginal thought was to make each layer a different linen color, with the table cloth being the base fabric. As I was trying to make that work I realized the linen was a heavier fabric than the cotton sateen of the black skirt, so I abandoned that idea for now and just used the table cloth.
 I love this skirt so I just wanted to copy the pattern without taking anything apart. I laid tissue paper down first then placed the skirt on top and made “pin-holes” through the skirt and on to the tissue paper. Then I just connected to dots on the paper to make the pattern pieces. I am showing the pattern piece which will be placed on the fold of the fabric. I needed the waistband, top yoke and bottom underskirt pattern. For the ruffles I cut straight lengths based on the measurements of the ruffles on the original skirt. That skirt also has a neet thing, the ruffles are different lengths. SO I went with that. Again the linen table cloth fabric was heavier than the Cotton so I took out a row of ruffles to help with the weight.
 I made the top section first with the zipper in the side seam. (I laid out the zipper section so you could see it… it is really in the side seam.)I like to finish off the ends of zippers since I usually never ever have the shorter sizes, I just fit the zipper in and cut the remaining length. Invisible zippers are easier to put in that way too.
I worked on the bottom half all in the round so I wouldn’t have any seams showing or ruffles sewn into the side seams. This makes for a smoother finish. The table cloth had a hemstitch accent around the border. I just incorporated that into some of the ruffles.
I then put the two parts together… and now I have a whole ensemble to wear this summer with Peggy at the French Flea Market, read about here… https://thethriftyneedle.wordpress.com/2011/07/12/french-flea-market/


If I make this skirt again, I would like to make it out of the lighter Cotton sateen because it lays so flat even for being ruffles. I think because I took out of row this fabric works. I also somehow want to make a skirt with rows of different linens and maybe even lace… I just have to dream about it first….
30 minute Ruffle layer Knit skirt
I am going to re-post an older post. I get emails from Pinterest with updated pins and things that I might be interested in. Well, funny thing, One of my ruffle skirts made out of an old tablecloth was the picture! The skirt pattern I am re-posting is just as popular, so I’ll start with this simple knit skirt.
 I needed another skirt (LOL!) and I have a lot of t-shirt fabric right now. So, I constructed a three layer skirt by making four tubes. The tubes are created from rectangles and then sewn/serged into a tube.
Tube number 1 is the waistband: Waist measurement___ -4″ = Length x 5″ width
Tube number 2 is the Longest layer. I drafted out a simple A line shaped skirt based off of my true waist, hip measurements, and length of skirt desired. Add 1 inch to the sides for both the seam allowances and fullness.
Tube number 3 is the next longest layer and I used the drafted number 2 tube for width and added an inch and a half at sides for fullness. For the length I divided my desired length (which was 19″) in thirds plus 1/2″ on top and bottom for seam allowances and hem.
Tube number 4 is the shortest layer. I drafted the same as the number 3 tube and added an inch and a half for fullness. The length is 1/3 of the finished length
 I serged number 1 tube and that will become my back seam. I folded that in half with the seams inside and hidden. Set aside while serging or seaming all the rest of the layers.
I serged all the layer tubes at the side seams to make the tubes.
Sew tube number 4 (the shortest layer) to number 2 tube and (longest layer) with a stretch stitch (basically that is a tiny slanted zig-zag) at the top edge.
The middle layer pin on the longest layer making sure the layer above covers the seam. You are basically top-stitching the middle layer onto the skirt.

I didn’t worry about finishing the seams because Knit won’t fray apart and the seam will be hidden.
I did sew two rows to make the layer lie flat at a slight zig-zag.
With right side together pin the folded Waistband tube to fit the skirt sections. There will be a gap in the skirt sections as they are wider. Sort of stretch the waist band…Not too much, just enough to fit so there aren’t any “pleats” in the skirt. I serged this all the way around. I tried it on and I liked it…. but I thought a bit more finishing was needed so I three needled serged (or rolled hemmed) all the layer hems to “clean it up”

I am using a jersey knit which has stretch. I used that stretch to make this a pull on skirt with no added elastic. Just the knit and it stays on quite nicely. The title and posting took way longer than the skirt! Knit is so forgiving
Have fun!
Cross backed Aprons
Tuesday I went to fabulous class at the Moore Botanical Gardens in Lake City. I will talk about that more in an upcoming post. I was so inspired and obsessed by my carpool friend, Barbara. She wore THE cutiest apron. It was steel grey linen and crossed in the back. I had to have a new apron!

This was the first one I made. I used fabric scraps left over from altering chef coats. I dyed the white fabric pieces lavender, sewed them together in and stitched them down. That sounds like a lot, but I had already pieced the fabric together before my apron whim. All I did was cut one large rectangle for the apron, attached straps and added a pocket…I like the design, however the twill fabric is too stiff, I liked Barbara’s Linen fabric… so try number two:


I recycled a long linen skirt I had and instead of square across the front I made more of a neckline, which I really like… I used it last night to cook dinner and then again this morning (thus the wrinkles) and I’m very happy with this one! but…
I have a pile of T-shirts to reuse so, apron number 3:
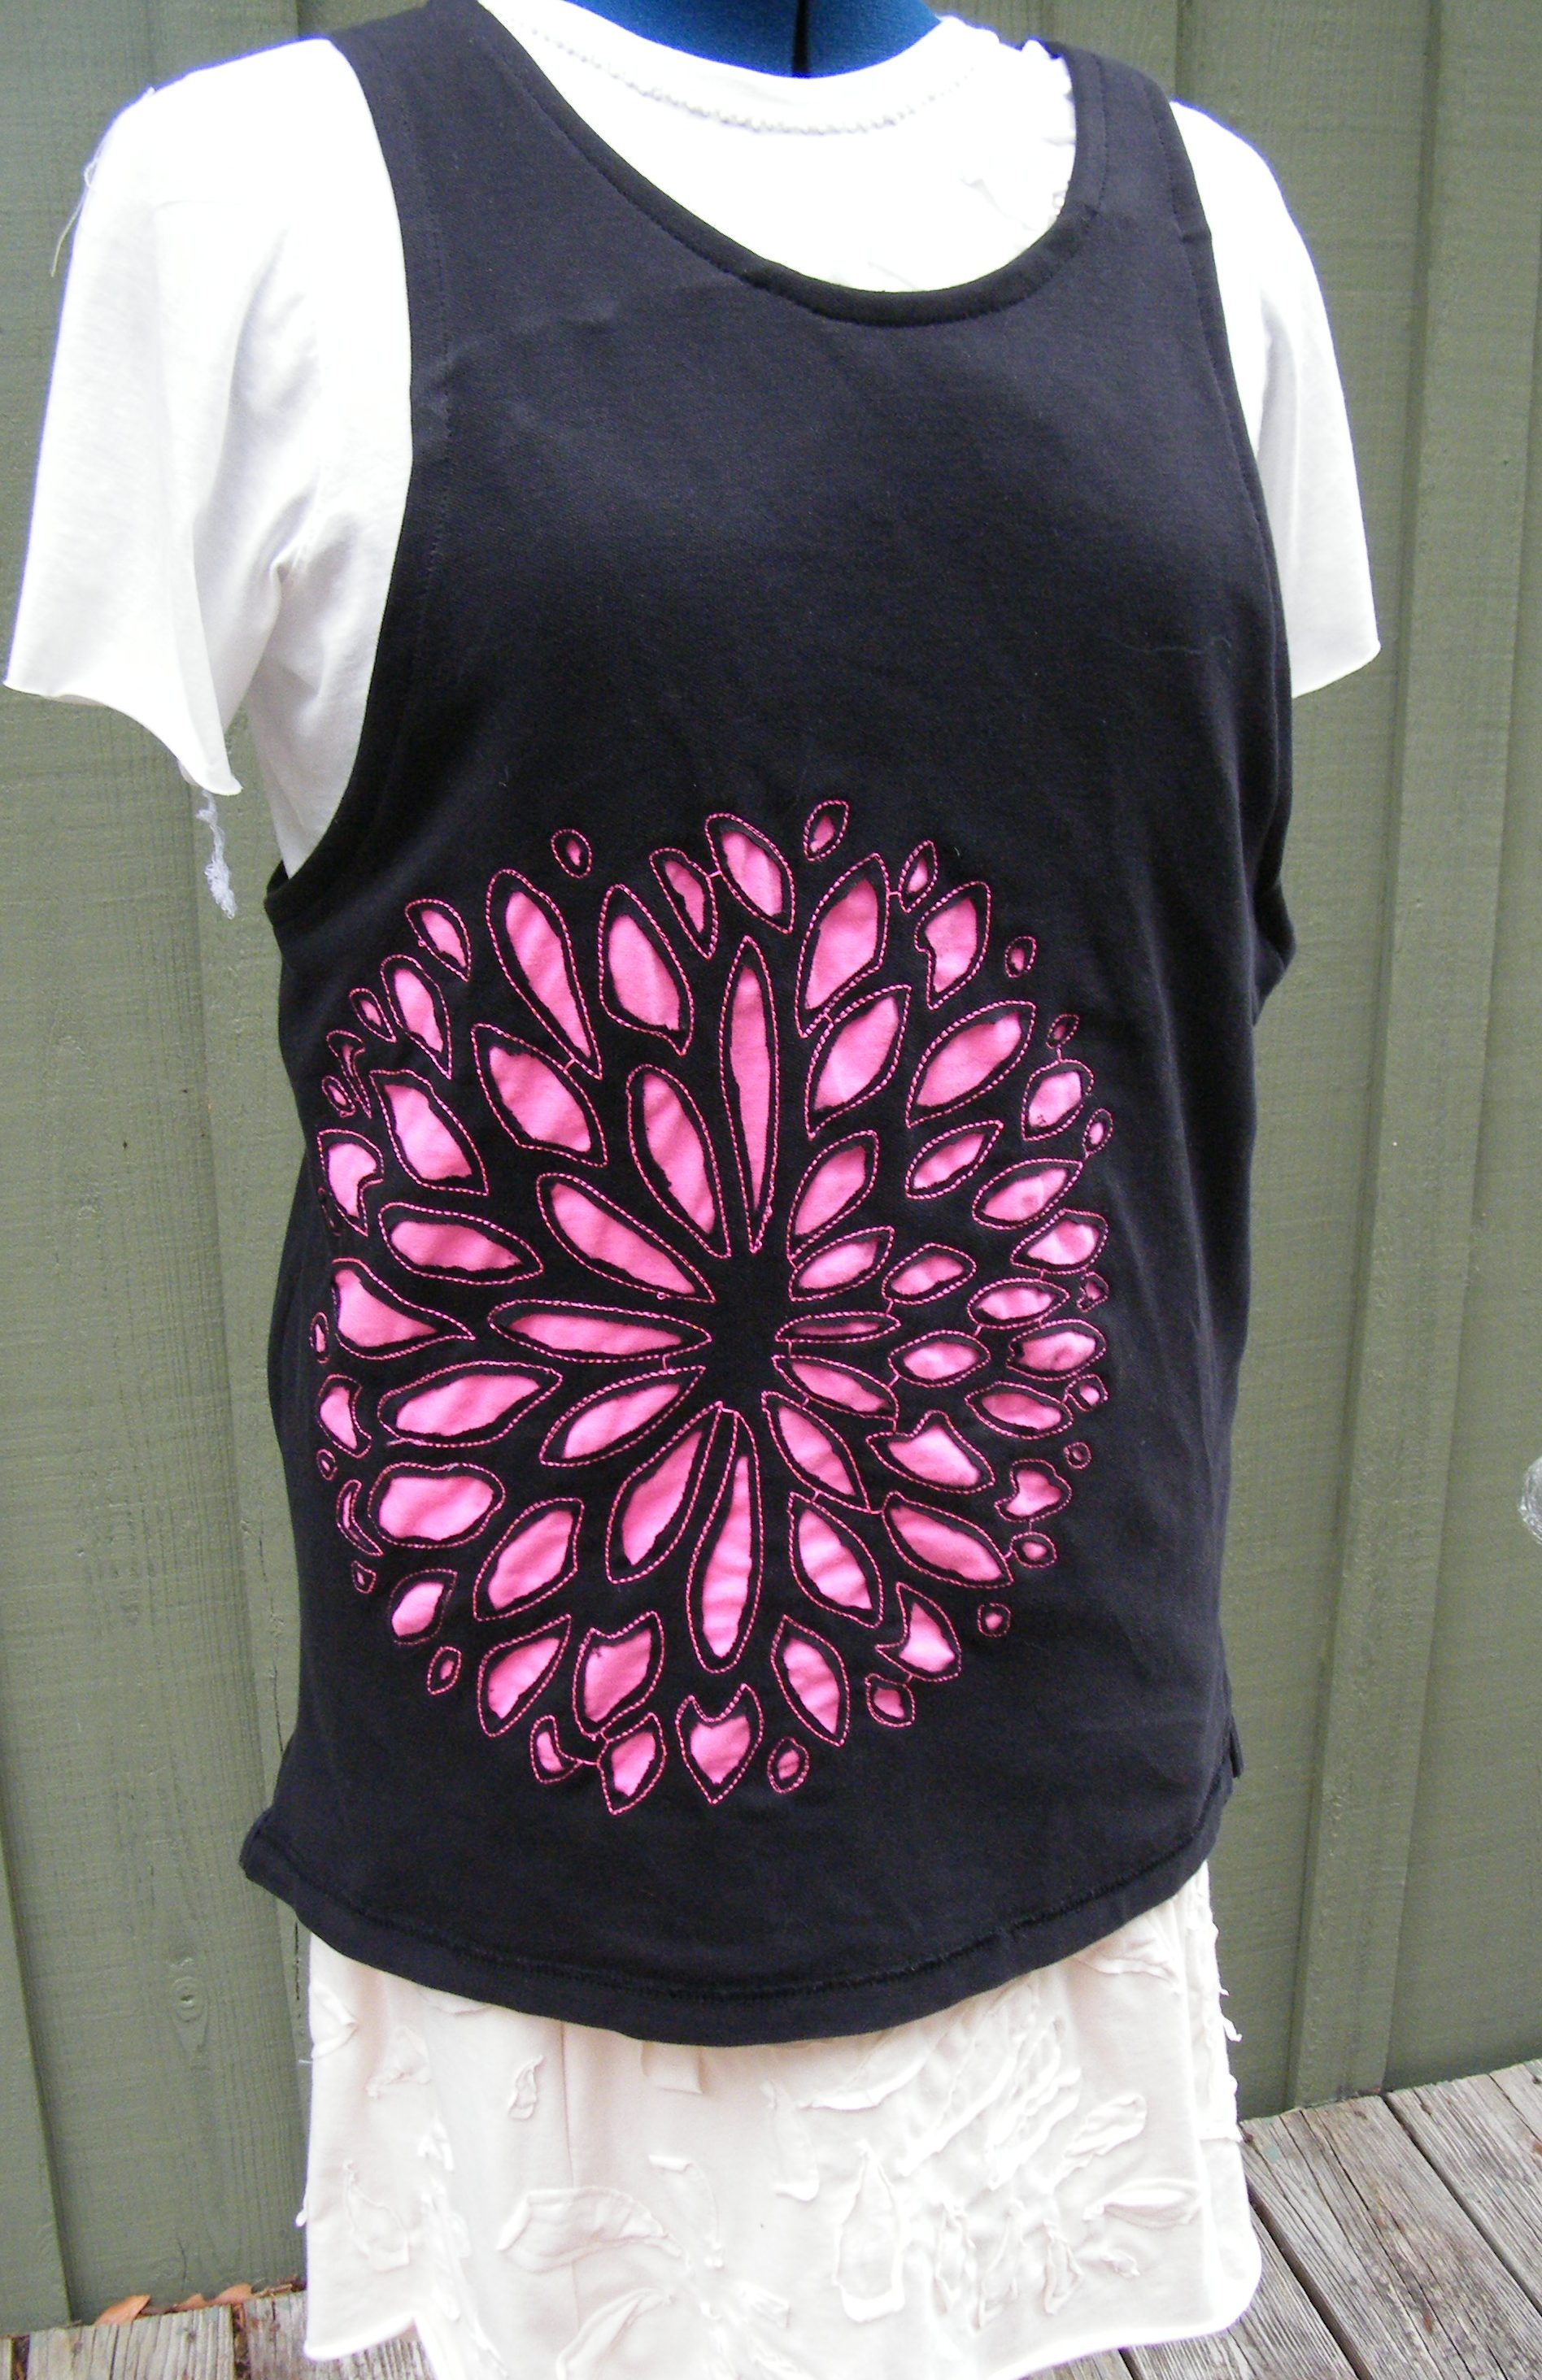
A little reverse applique! I want to add some hand stitching, around the flower next, maybe. I think this will be my most useful one, not too long, easy to throw on, and it’s already spotted so I don’t care if more cooking splatters happen!
So… What’s under the aprons??? The dress form was already in use before I needed it to model the aprons. I’m creating another knit outfit and here’s a sneak peek, overlook dangling threads, unfinished hems etc….

Here’s a close up of the in process skirt, I have more freehand machine stitching to do to add petals and some hand stitching needs to be added…

Newer T-Shirts…
These are two new t-shirts I am working on at present. Both are made from recycled clothing and both are the exact same design that I drew, scanned and digitized using the IQ feature on my Destiny. This is something I haven’t tried and wanted to see if it would work for what I wanted to design.


I drew out two different doodles of shapes, sort of flower-ish. I only wanted a line design to out-line the shape. 
The rest was so hand work while watching Masterpiece and waiting at the dentist….. I still have more to finish but I’m almost finished with two shirts in about a week.
Fun!
DIY skirting table and sweater dryer
I needed a skirting table to sort my fleece and I also need a larger space to wash and dry my winter sweaters to put them away for the summer season. SO I came up with this idea using:
- portable drying rack
- 3″ strips of scrap fabric
- assorted velcro lengths
- netting or mesh piece
 This is my drying rack. Measure the top width and length when opened up all the way.
 Cut a piece of mesh or whatever fabric you have to use as the netting to the above size.
 Sew strips of velco to a 3″ wide piece of fabric.
 Sew that strip to the ends of the mesh along one edge. then flip the mesh and sew the other strip to the opposite end.
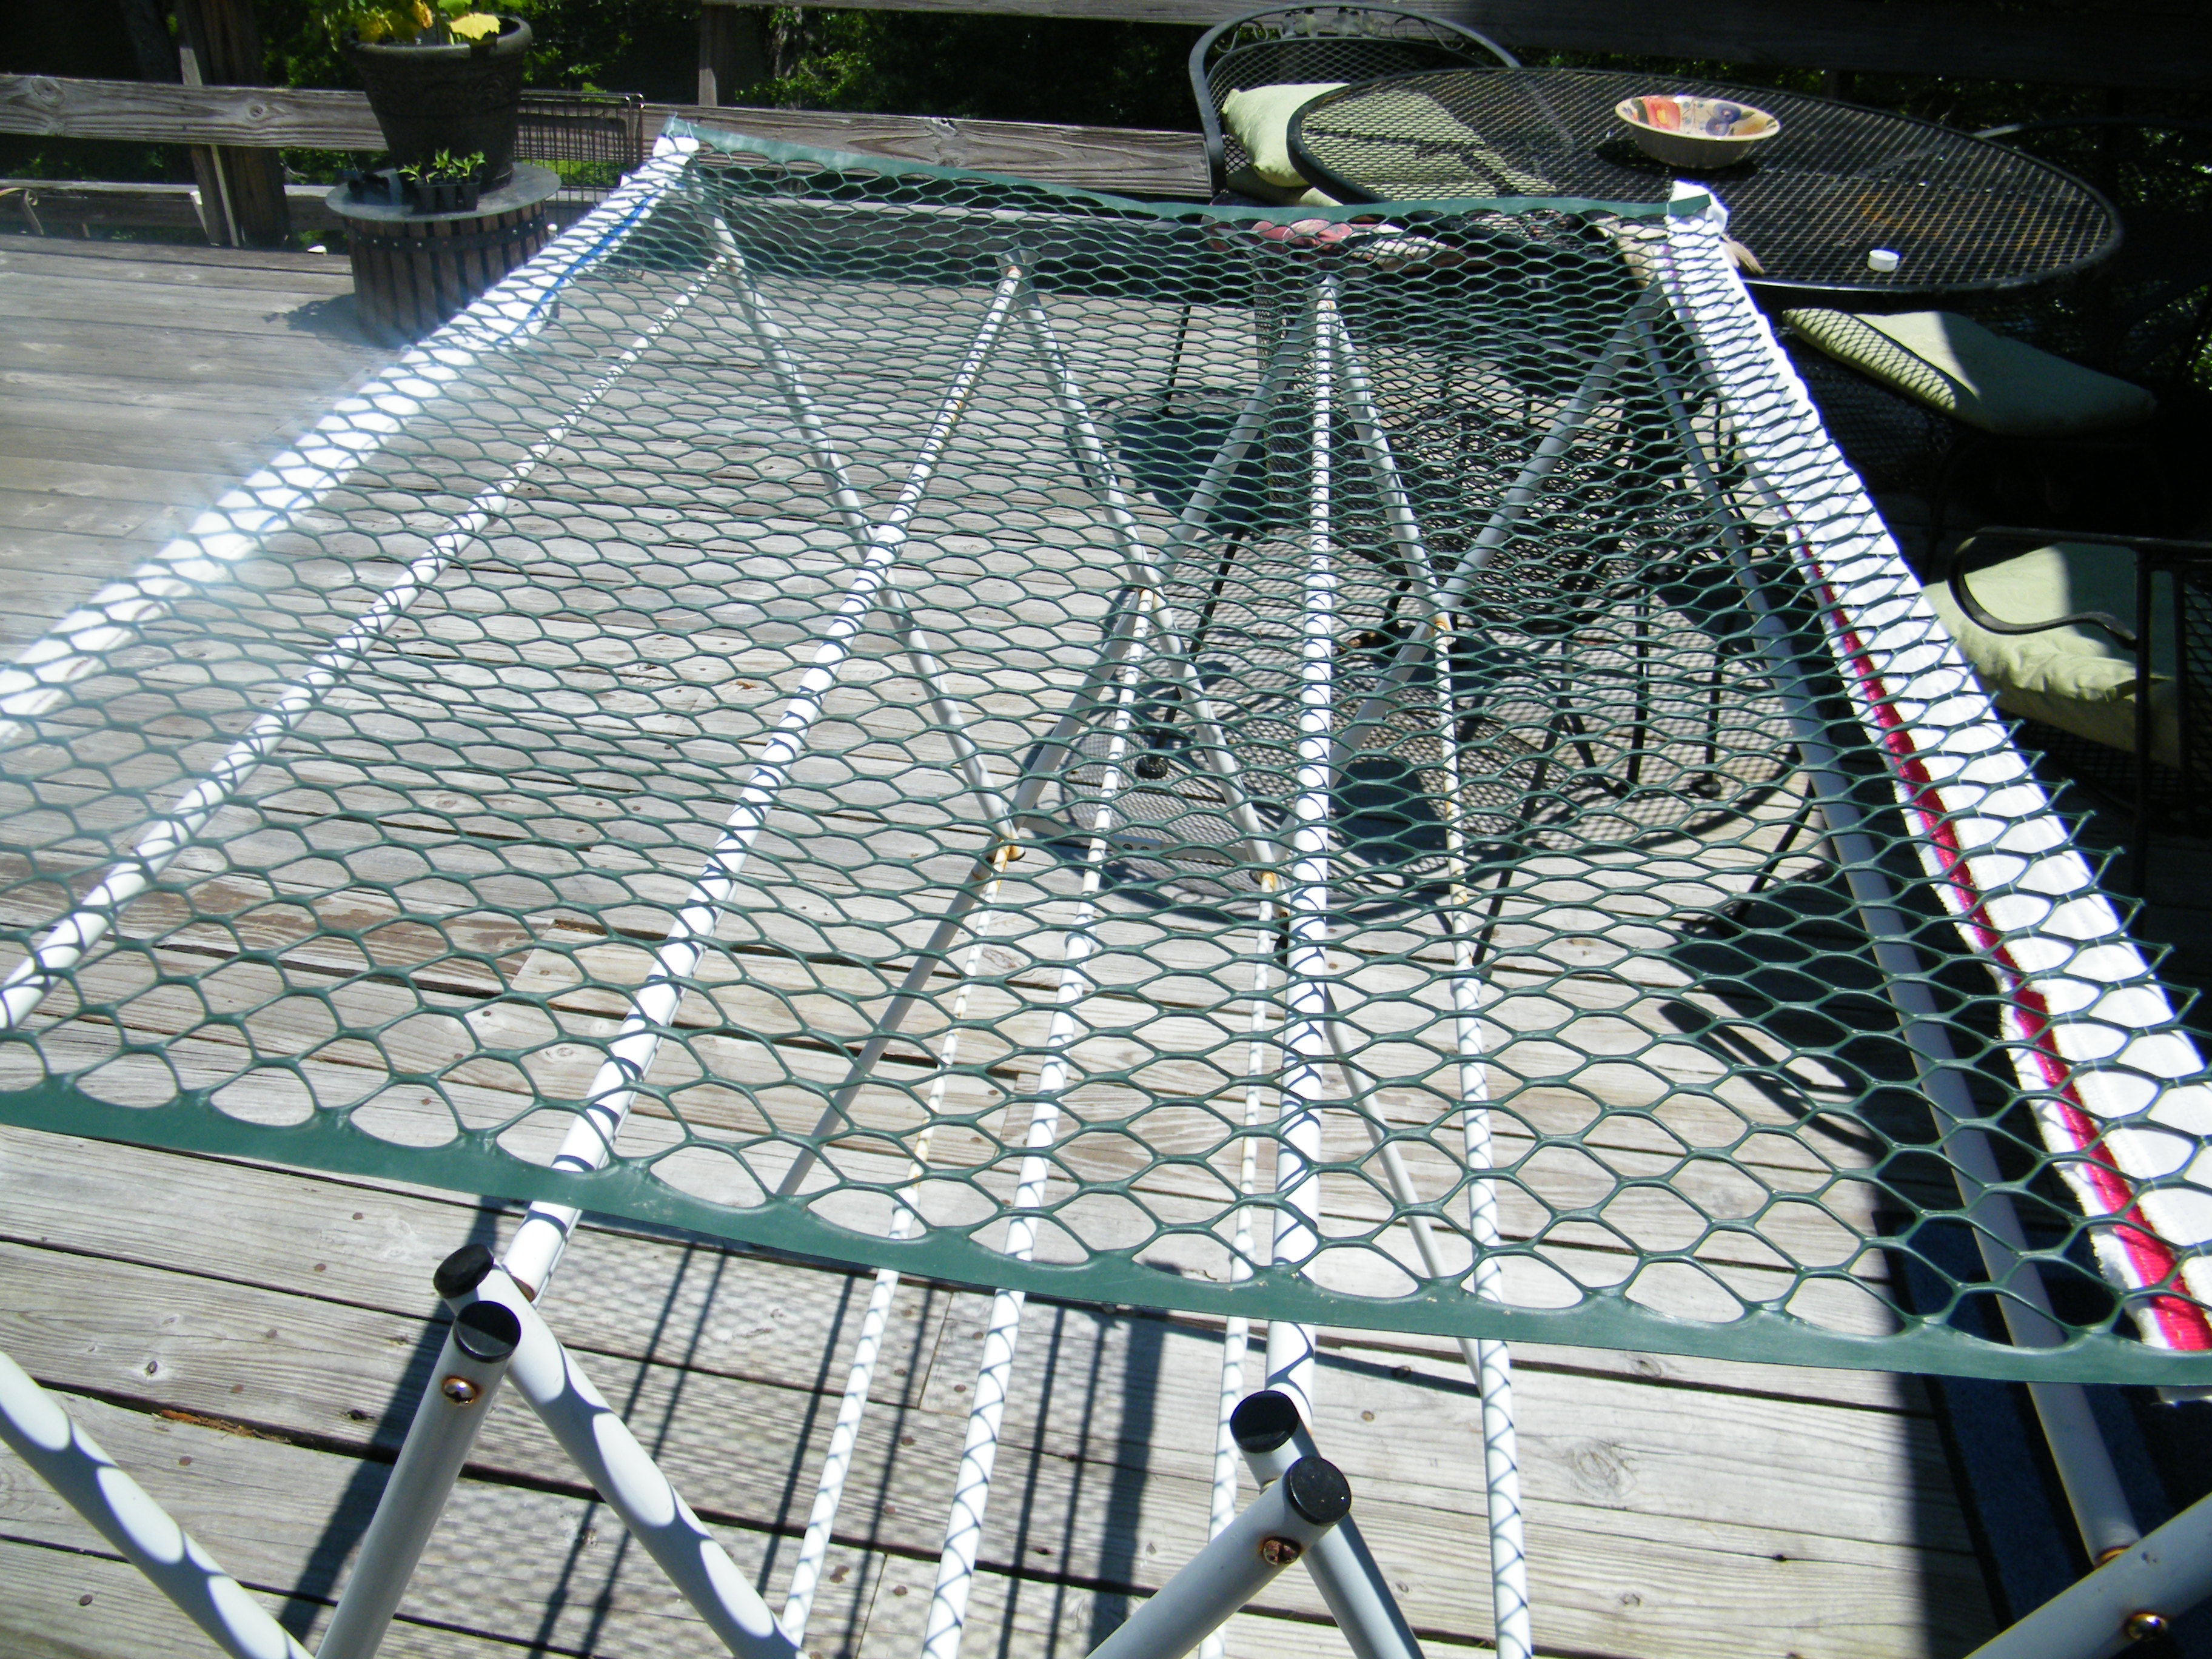 Wrap and velcro around the last two bars of the drying rack.
 Start sorting your wool…. Now, I have a smaller mesh more like a fabric screening and I want to make the exact same thing for drying my sweaters. ( I don’t want to put clean sweaters to dry on un-cleaned fleece ….) 🙂
More Business Cards
I am going to a Quilt Gala This weekend. I am demonstrating all day Friday… Lucky ME!!! I am get to sit and sew all day, at a quilt show! How cool! I needed to have some new cards to give out to ladies and here they are, new cards just for this event.
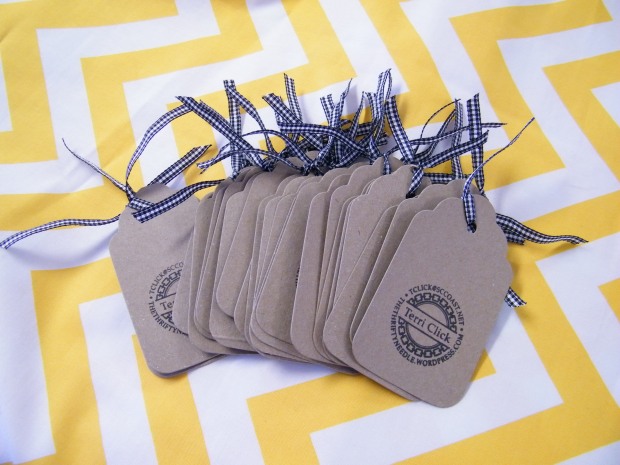
 I started with my sizzix and a scalloped top tag shape. I recycled card pieces from an order earlier this week of Dickies men’s shirts with the company logo embroidered . I had a dozen shirts so… 12 cardboard inserts to reuse.

The back are black, some with printing, some solid and then some with an abstract part of the packaging.I threading them all through with a spool of ribbon and simply tied them off. 
Something different and something that stands out. I made 50 new business cards with just the information I want to give out for nothing and I re-purposed something! My Noteworthy stamp was a gift from my Mom as a house warming gift, and I ordered it from Sassy Girl, gifts and special things at:
http://www.sassygirlgifts.com/
Vicki has tons of styles and looks, even different color inks (red and blue are on order for me now!) I have two stamps, but you only need one ‘base’ and change out the actual stamp for endless uses. There are almost too many styles to choose from! Have fun!
Beeswax Wax
This is the recipe I use for finishing wood. This can be used after a chalk finish or just a plain finish on wood that is all natural.
Start with Beewax about 1/4 of cup a shaving or in my case the honey comb remnants.

Mix that with a cup of Olive oil, You could use any oil (lemon oil, coconut oil…etc…) I just have Olive oil.

Heat in Microwave until the Beeswax is melted. About 2-3 minutes… keep checking so you don’t scorch or burn.

I have to strain my mixture you may not have to if you started with clean beeswax. Do this while mixture is hot.
 Stir until cool and creamy.
Wipe on wood, a little goes along way and then wipe off excess with a cotton rag.
Store extra in an airtight container. I use every now and then on my wood furniture to spruce it up and protect the surface. I have a family full of people would refuse to use coasters so I have water glass marks on everything and this work wonders. It’s great for your hands too!! I can tell I need a manicure from those shots..eekk!
Necessity is the Mother of invention
Thread comes in all sorts of cones and spools in different shapes and sizes. When sewing you want the thread to ‘spool off’ in an even fashion for the best sewing results.
 I was taking a break from painting during a pop-up storm today. The only machines I have at the Riverhouse are two treadles. Now, back in the day when ladies sewed on these I don’t think thread on industrial cones were available to home sewers…. The thread came on spool and fit nicely on the thread spindle, which fed nicely into all the guides for a perfect stitch.
I only had read thread on a cone… what to DO?? The cone will not fit on the spindle nor will it spool off evenly.
There is a sewing notion called the thread-pro. It is a base with with two spindles, one horizontal and one vertical. It goes behind the machine to guide the thread up and over for better threading…. I didn’ t have one with me… so let’s get creative……. I hope you can see this….. It got dark out side in that fast and quick storm. I had a spool of wiring and I removed the mini blinds turning bar. I stuck that bar in the center of the spool to hold it up right. I Then just threaded the cone thread by placing it next to the spool and up through the hole on the bar… I brought it around to the machine in front and thread as normal.
Here are some examples of what I have at home…

Here is a close up of the top if the bar … I added bent paperclips in the ones at home
Here is another one I have with an added bee’s wax ring I have used that a number of times for cording or gimp or yarn in couching and decorative machine work. The two I have at home are from broken mini blinds, the one at the riverhouse today was NOT broken and I didn’t want it to break, but it has a clear plastic hook on the end which hooks to the mini blinds. That hook is perfect for just hooking the thread and guiding to your machine.
It really is a simple fix. In my classes I have made emergency thread guides out of a liter soda bottle (empty) and a dowel rod or mini blind bar and it works wonders on tricky threads to run smoothly. Just insert the bar into something that will hold it upright.
Winner!
We have a winner for my Birthday give-away!
Gail!! (I’ll be contacting you via email!!)

In keeping with my Thrifty and re-purposing theme… I made an apron from a size 0 skirt!
The fabric is a a dreamy silk/linen blend with such a springy cheerful color palette! I hope you like it Gail!
This is all I have left-over for scraps.
 I’m coveting the zipper….because it’s already going into a new skirt.
Thank you, Thank you, Thank you all for leaving such nice comments and best wishes for the next year of blogging! Thanks for coming by and I hope I inspire you in some way.
I know that I am inspired to be more and do more by all of you! 25 years ago when I/We started out our adult life with a little girl and the dream to say at home and raise her by sewing and saving and being thrifty… who knew what a wonderful way of life I would have. We raised all four children with me sewing and thrifting to make our home work… and guess what…. it did and does! I felt all alone at times so now, so I hope somewhere I can inspire or encourage a a kindred spirit of thrift that Yes, you can….
